
Martyna Szeszko
Mar 20 2023 10 min read
Martyna Szeszko
Mar 20 2023 10 min read

There was a need to add a plugin for masking e-mail addresses inside Rich Text Editor to prevent spam messages. This new RTE plugin was created as a custom, fully customizable component written from scratch for the ds.pl website. Let's follow the process of creating such a component, with a little help from TipTap library, which lies underneath the Rich Text Editor.
The new component is supposed to add a masked email address to prevent spam messages. An anchor tag should not contain a plain, easy-to-read email address, but instead should use data attributes for storing email parts. An example of a protected email address could look like this:
<a href="" data-part1="info" data-part2="ds" data-part3="pl" ... >Contact Us</a>
After the page is loaded, the script should convert these data parts into the whole email address, like in a regular link with the mailto: prefix:
<a href="mailto:info@ds.pl" ... >Contact Us</a>
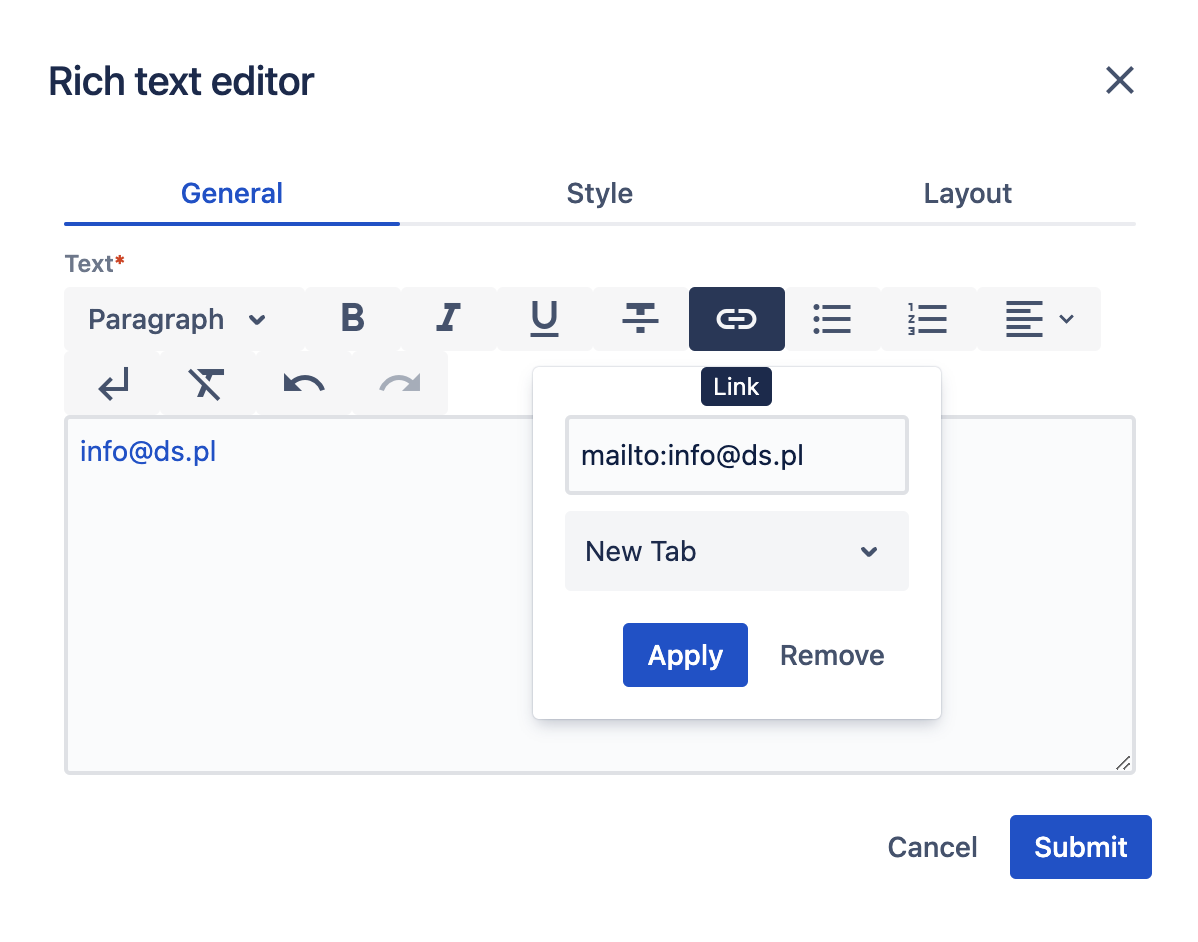
From the user's perspective, RTE should have a dedicated button which allows users to input an email address and the rest would be happening under the hood. The button could be placed next to the Link button. This is how the RTE component looks like now:
Due to component specifcity, the work can be split into two parts:
CMS part - where adding/editing/deleting and encrypting email addresses is happening within the Rich Text Editor
page part - where RTE configuration and email decoding happens
Therefore, the component must be used with the script provided within the page, otherwise, email links won't be decoded.
As the decoding email script will be the last step, let's focus on the main issue here - extending the RTE editor. The editor component is made up of two parts: the plugin element and the UI element. The plugin part is responsible for the plugin behavior and it is directly related to the UI part, which is providing the UI for the plugin itself. In Websight CMS, the tiptap library is responsible for plugins and a separate module that is a part of Websight CMS - for UI. As for the plugin, we can either extend or create a new extension. But what about the UI element for this plugin? None of these (button, button dropdown, list dropdown, link) match the requirements, because we need a dropdown with one input (link UI has input and select with target attribute selection). So we need a new UI as well.
Let's start by preparing an extended configuration according to the documentation. The example path for an extended configuration could be /apps/rte/extended/configuration/.content.json. After that we can use this new configuration in our components, just like described here.
{
  "sling:resourceSuperType": "wcm/dialogs/components/richtext/configurations/default",
  "link": {
    "sling:resourceType": "wcm/dialogs/components/richtext/ui/link",
    "title": "Link",
    "icon": "link",
    "plugin": {
      "sling:resourceType": "extensions/dialogs/components/richtext/plugin/link"
    }
  },
  "email": {
    "sling:resourceType": "extensions/dialogs/components/richtext/ui/email",
    "title": "Email",
    "icon": "alternate_email",
    "plugin": {
      "sling:resourceType": "extensions/dialogs/components/richtext/plugin/email"
    },
    "sling:orderBefore": "bulletlist"
  }
}To connect our JSON configuration above to actual scripts, create the following files with a path pointing to our script:
{
    "type": "/apps/websight-rte-extensions/web-resources/components/richtext/plugin/Email/Email.js"
}Our new plugin will affect another plugin that is already in the default version in RTE - Link. We need to exclude email handling from the Link plugin, as we will cover that in the email plugin. That means we also need to modify the Link plugin by creating a custom link plugin.
So a similar file needs to be created for the link:
{
    "type": "/apps/websight-rte-extensions/web-resources/components/richtext/plugin/Link/Link.js"
}Then let's create the UI element for e-mail:
{
    "type": "/apps/websight-rte-extensions/web-resources/components/richtext/ui/EmailDialog.js",
    "configuration": {
        "title": "${properties.title}",
        "icon": "${properties.icon}"
    }
    <sly data-sly-list="${resource.children}">
        <sly data-sly-test="itemList.first">,
            "plugin": <sly data-sly-resource="${item}"></sly>
        </sly>
    </sly>
}There is very supportive tiptap documentation on how to build such custom extensions. In our case we can also just base our code on Link docs and Link code.
Extend or write from scratch?
Extending an existing component requires less code writing, as we can only replace particular methods. The obvious component, in this case, would be the Link component, as the behavior would be very similar. But the differences are significant, too. Fortunately, there is no need to decide now, as we can simply switch from extending to creating.
Some chosen methods from component:
...
const CustomEmail = Mark.create({
  name: 'email',
  priority: 1000,
  addOptions() {
    return {
      linkOnPaste: false,
      autolink: false,
      validate: undefined,
      HTMLAttributes: {
        rel: 'noopener noreferrer nofollow',
        class: null,
        'data-part1': null,
        'data-part2': null,
        'data-part3': null
      }
    };
  },
  onDestroy() {
    reset();
  },
  inclusive() {
    return this.options.autolink;
  },
  addAttributes() {
    return {
      class: {
        default: this.options.HTMLAttributes.class,
      },
      'data-part1': {
        default: null
      },
      'data-part2': {
        default: null
      },
      'data-part3': {
        default: null
      }
    };
  },

  parseHTML() {
    return [
      { tag: 'a[data-part1][data-part2][data-part3]' },
    ];
  },
  renderHTML({ HTMLAttributes }) {
    return [
      'a',
      mergeAttributes(this.options.HTMLAttributes, HTMLAttributes),
      0,
    ];
  },

    ...

  addProseMirrorPlugins() {
    const plugins: Plugin[] = [];

    if (this.options.autolink) {
      plugins.push(
        autolink({
          type: this.type,
          validate: this.options.validate,
        }),
      );
    }

    if (this.options.linkOnPaste) {
      plugins.push(
        pasteHandler({
          editor: this.editor,
          type: this.type,
        }),
      );
    }

    return plugins;
  },
});

export default CustomEmail;
TipTap library is built on top of the ProseMirror package but almost every functionality can be done without any knowledge of it, as TipTap is handling it under the hood. However, for handling some events we need to add the addProseMirrorPlugins() method and inside it create prosemirror plugins to handle this special event-based behavior. Here is an example usage of ProseMirror API, so the helper file would look something like this:
export function pasteHandler(options: PasteHandlerOptions): Plugin {
  return new Plugin({
    key: new PluginKey('handlePasteEmail'),
    props: {
      handlePaste: (view, event, slice) => {
        ...
      },
    },
  });
}
Finally, we can create an Email.ts file with the component which loads the previously registered plugin:
import CustomEmail from "./extension-email.js";
import { splitEmail } from "./helpers/splitEmail.js";
import { validateEmail } from "./helpers/validateEmail.js";

const Email = () => ({
    getTipTapExtensions: () => [CustomEmail.configure({autolink: true, linkOnPaste: true})],
    getAction: ({
      editor
    }) => ({
      execute: ({hrefDecoded}) => {
        if (validateEmail(hrefDecoded)) {
          editor.chain().focus().extendMarkRange('email').setEmail({
            hrefDecoded,
            ...splitEmail(hrefDecoded)
          }).run();
        } else {
          editor.chain().focus().extendMarkRange('email').unsetEmail().run();
        }
      }
    }),
    getState: ({
      editor
    }) => ({
      isActive: editor.isActive('email'),
      ...editor.getAttributes('email')
    })
});

export default Email;getTipTapExtension method is doing exactly what its name indicates, as well as making it possible to switch off/on some plugin features
execute runs when the user clicks the submit button
getState is passing the current editor state
Script for decoding is quite simple, as it is scanning the page and converting three data parts to a proper email address:
window.addEventListener('load', () => {
    const links = document.querySelectorAll('[data-part1][data-part2][data-part3]');
    for (const link of links) {
      const attrs = link.dataset;
      link.setAttribute(
        'href',
        `mailto:${attrs.part1}@${attrs.part2}.${attrs.part3}`
      );
    }
});The implemented extension for RTE is presented below.
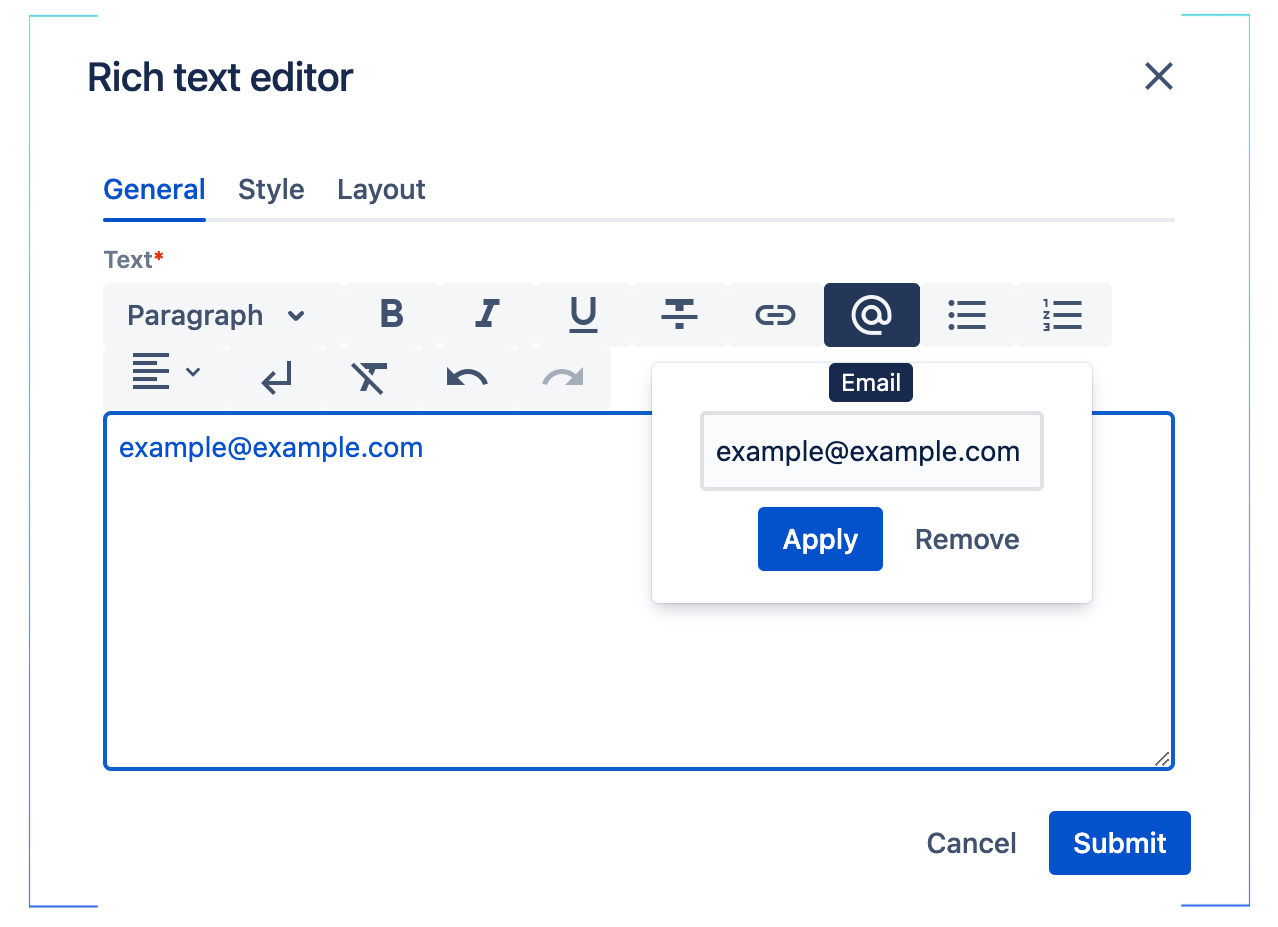
First of all, we created new entries in the richtext JSON configuration file, then we added proper JSON files with paths corresponding to actual scripts. After creating and extending the existing component we could add a simple script for decoding emails on our page.
As we can see, Rich Text Editor can be easily extended with any functionality we want, due to the flexible architecture model used in Websight CMS. Furthermore, creating an extension with the TipTap library offers broad possibilities, as well as creating a new UI component within CMS.